QuickStart GuideDocumentation – Videos & PDFsFAQSelection Tool – Gage/Cable FinderRM2.4 Wireless Protocol
Setup Programs & UtilitiesFirmware UpdatesUser Guides & Tech NotesMobileCollect Certifications
RM2.4 Gage IntegrationZigbee Compatibility
QuickStart GuideDocumentation – Videos & PDFsFAQ
Setup Programs & UtilitiesFirmware UpdatesUser Guides & Tech NotesUSB DriverGageWay Certifications
Setup Programs & UtilitiesFirmware UpdatesUser Guides & Tech NotesUSB DriverWedgeLink Certifications
Evaluate our products at your location!
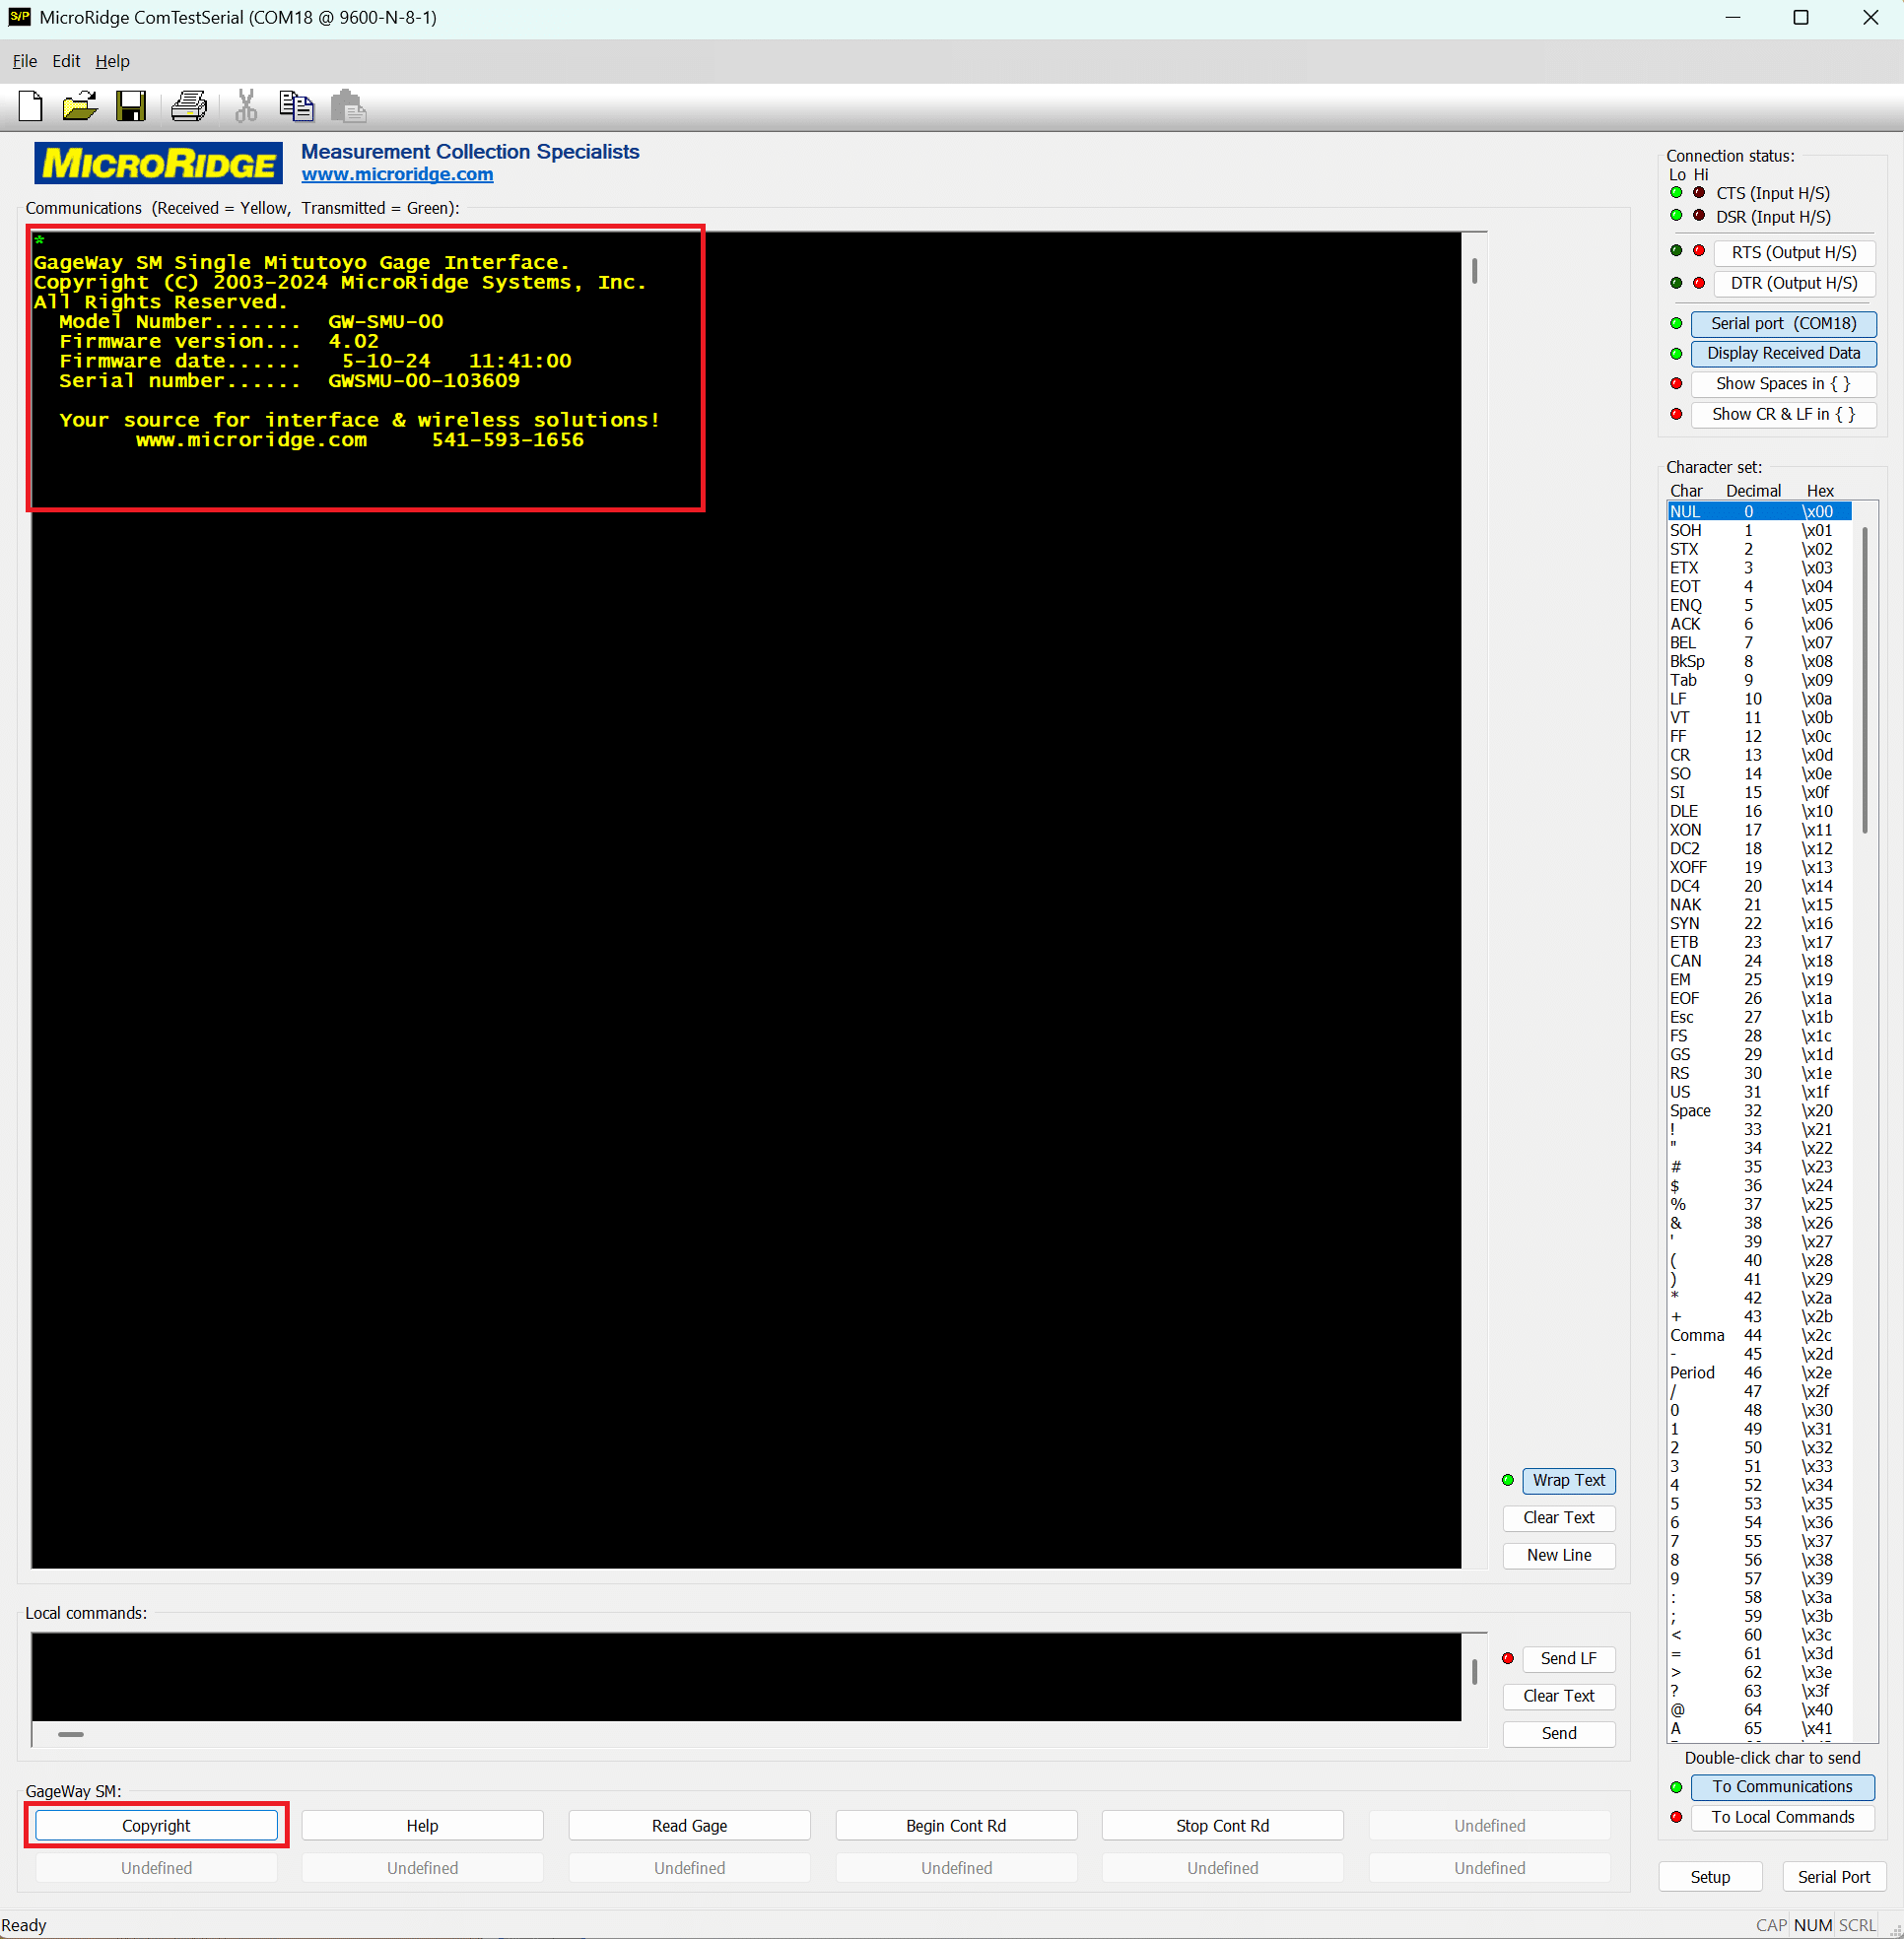
Serial Communications Test Program
User Guides, Spec Sheets and more.
NewsWhite PapersAbout MicroRidgeInstagramContact Us
FAQWarranty & ReturnsProduct SupportMade in the USA
SPC Software PartnersGage Integration Partners
GageWay SM QuickStart Guide (https://www.microridge.com/gageway-interfaces/gageway-sm-quickstart-guide)